
Ever watched your kitty give a dusty feather toy the stink-eye?
When grime and loose fur build up on the polymer (a tough, plastic tube) rod and feathers (soft quills that tickle whiskers), your teaser wand just hangs there.
In this guide, we’ll show you simple steps to wash feathers in mild soap, air-dry them, and wipe down the rod so it’s snag-free, plus keep that little bell (tiny metal bell) jingling.
Stick around and you’ll bring back fluffy feathers, smooth swings, and claw-tastic play sessions.
Worth every paw-print.
Comprehensive Cleaning Procedures for Interactive Teaser Wand Attachments
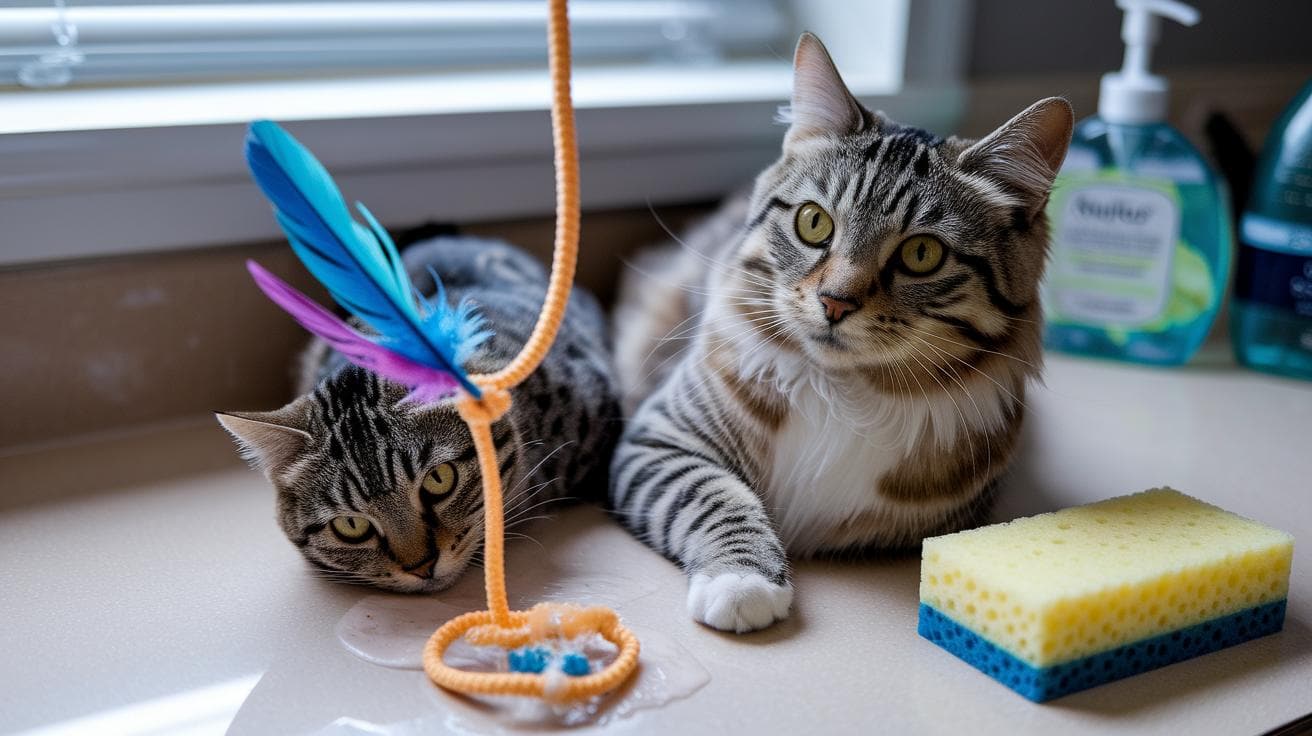
Got gunk building up on your teaser wand? Cleaning it keeps mold away, frees stuck fur, and makes playtime feel fresh again. Start by taking it apart gently (no yanking or you’ll bend the metal rods). Ever watched your cat give a toy the stink-eye? Your kitty will be feline fine with a plume that’s squeaky clean!
- Follow the maker’s guide to disassemble the wand. No tugging or you’ll bend the metal rods.
- Wipe the plastic rod and foam grips (like a squishy sponge) with lukewarm water and a pet-safe cleaner (a drop of dish soap works).
- Fill a bowl with warm, soapy water. Let feathers, bells, and strings float for 5 to 10 minutes.
- Use a soft cloth or sponge to brush away dust and loose hairs. Gentle strokes only.
- Rinse rubber tips under running water until all soap feels gone.
- For extra shine on feathers, mix equal parts vinegar and water. Gently swirl the plumes, no rough scrubbing.
- Skip bleach or harsh chemicals near your pet. Vinegar is your go-to.
- If you spot wiring or any electronic bits, don’t dunk them. Just wipe with a barely damp cloth.
- Pat each piece dry with a lint-free cloth. Pay extra attention to creases and foam grips.
- Lay parts flat on a towel or hang feathers upside down to dry. No direct sun or heat, feathers can get crispy.
- Give elastic cords a gentle stretch test. If they still feel sticky, rinse and dry again.
- Once everything’s dry, click all joints back together and wiggle each knob to check the fit.
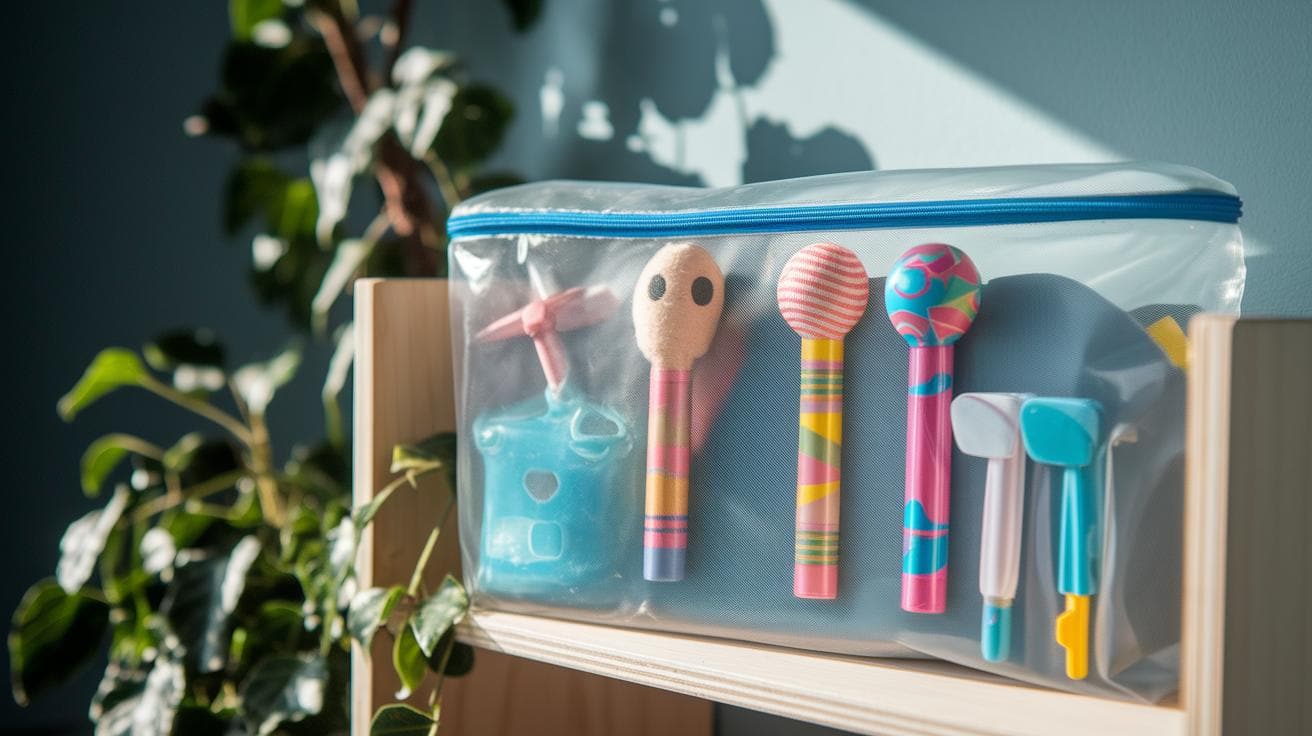
Pro tip: tuck clean attachments into a zip-top bag until the next play session, your cat will thank you.
Thorough Drying and Lubrication Tips for Interactive Teaser Wand Longevity
Now that your teaser wand is fresh out of cleaning, grab a lint-free cloth. Blot each rod section (the long poles that slide in and out) until you see no water left. Don’t rush, damp spots hide in tiny crevices and can slow when you want playtime. Ever watched your kitty bat at a damp toy? Not so fun.
Let all the pieces air dry for at least two hours. Lay the wand flat or hang it by the handle so foam grips (the soft, bouncy bits) and rubber tips stay clear of moisture. Skip direct sun and blow drying. Feathers can get brittle and foam can go flat.
Next, focus on the foam handles. They’re like little marshmallows under your cat’s paws. Press gently with a soft rag to squeeze out any last drops. You’ll see them plump back up. Ready for safe, squishy play again.
Worth every paw-print.
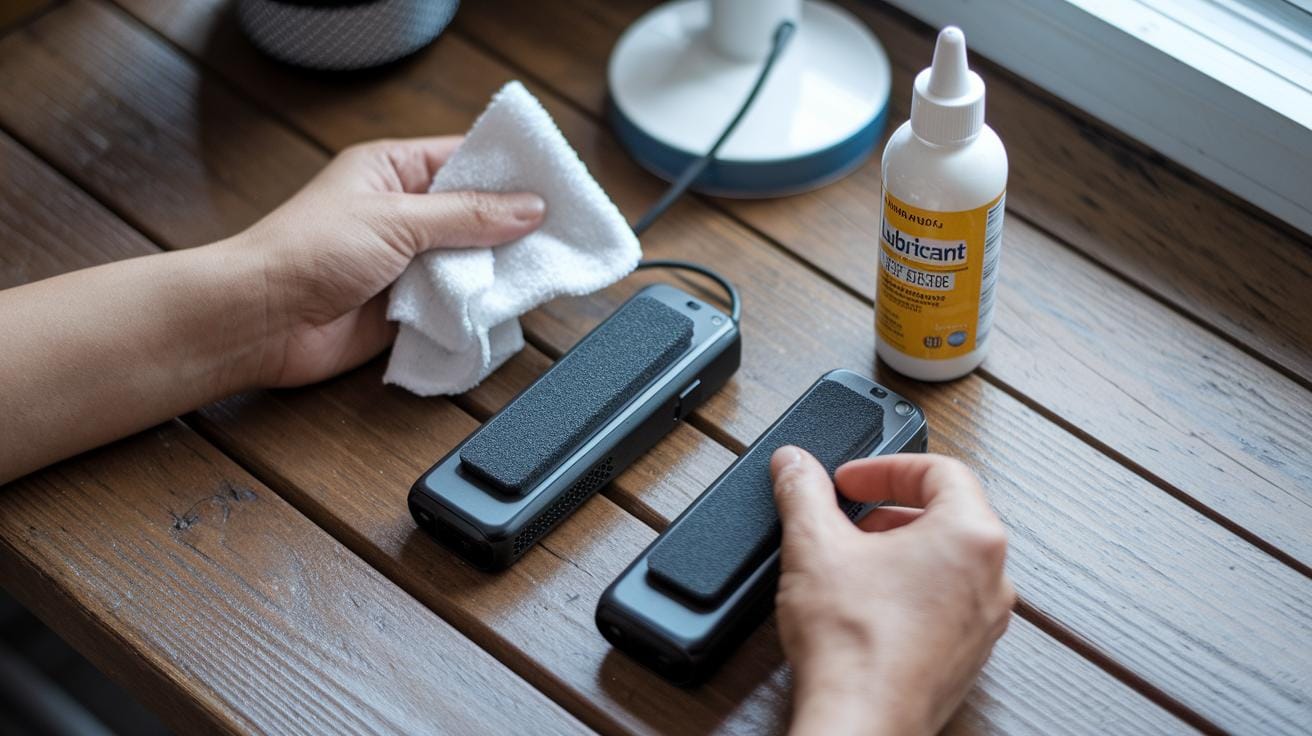
Now it’s time to oil the moving parts. Pick a silicone-based lubricant (think bike-chain oil but pet-safe). Spread a thin coat on all the joints and hinges. Pay special attention to the telescopic sections (the parts that extend and collapse) and the spring areas.
Then open and close the wand a few times. You’ll hear a light clink as the lube settles in. Finally, make sure everything’s completely dry before you lure your kitty back in. Let’s keep your play sessions paw-some!
Optimal Storage Practices for Interactive Teaser Wand Maintenance
Let’s tuck your teaser wand away in a cool, dry corner so it’s always ready for action! Maybe a shelf in the basement or inside an armoire – not a scorching attic, okay? High heat can warp the plastic handle or the foam grip (the soft cover you hold) until it’s all bent out of shape. And keep it out of direct sunlight too. Faded colors are no fun, and sun can make it brittle.
After a lively chase, pop each toy tip into a zip-top bag (a moisture-proof bag that locks out dampness). Feathers, little bells, even those elastic cords (stretchy bands) stay free of mold that way. Lay the cords flat instead of pulling them tight. It helps them last longer until the next big pounce!
Keep an eye on the tiny bits too – spare strings, extra feathers, and those little connector clasps. Slip them into a labeled pouch so you’re ready for any on-the-fly repairs when cords start fraying or connectors go loose. No fumbling around keeps playtime swift!
Next, grab a small notebook or even a quick spreadsheet by your stash spot. Jot down when you cleaned each piece, when you stowed it away, and which bits you used. Then you’ll know exactly when it’s time to swap in new feathers or snug up any loose screws. With toys protected and a neat record to guide you, play sessions stay smooth and paw-some.
Systematic Inspection and Preventive Checks for Your Interactive Teaser Wand
Every month, carve out five minutes for a quick wand check. It’s like a little tune-up for your cat’s favorite toy. You’ll catch small issues before they become big problems. Trust me, your kitty will purr in approval.
Start with the handle. Run your fingers along the shaft and foam grips (squishy padding). Feel for cracks, splinters or soft spots. Peek under the foam for hidden splits.
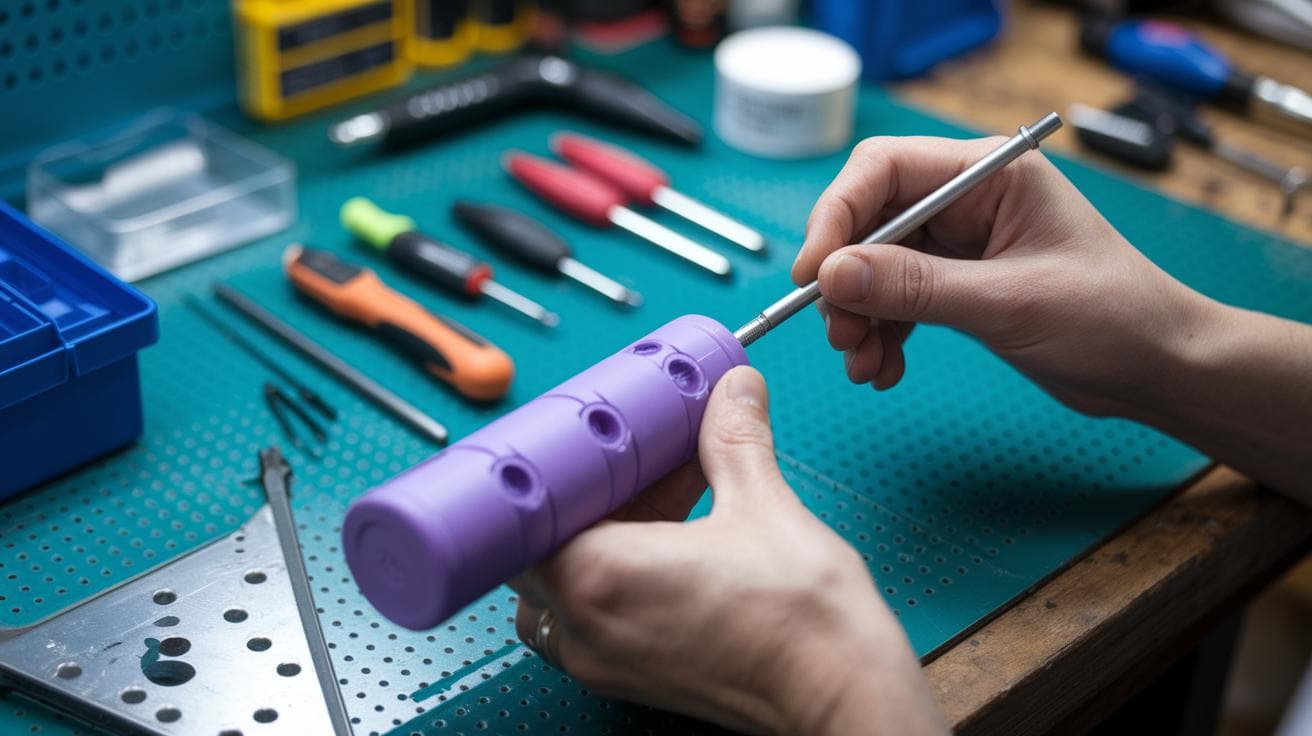
Next, focus on the metal rods (sturdy tubes) and connectors. Slide your hand along each section. Check for rust, rough patches or wobbling joints. Grab a mini screwdriver and give each screw a quick turn to keep things snug.
Now let’s test the telescoping sections. Pull each rod out and push it back in. It should glide smooth and click into place. If you feel a snag or a chip in the coating (the paint layer), pause and inspect.
Time for the fun bits – feathers or yarn attachments. Ever seen your kitty bat at a dull feather stick? If the colors look faded, it’s time for fresh ones. Then stretch each elastic cord (the stretchy band) halfway and watch it snap back purr-fectly.
Finally, run your fingers down every string and yarn tail. Spot any tight knots or loose fluff. Snip stray fibers with scissors to dodge tangles. Now you’re all set for safe, surprise-free play.
Claw-tastic!
DIY Repair Techniques and Sourcing Replacement Parts for Interactive Teaser Wands
Lost the zoomies on your teaser wand? No worries. Grab a few basic tools and let’s get those whiskers twitching again.
- Repairing frayed toy strings: First, snip off the ragged ends with scissors. Tie a double knot so it feels tight. Dab a tiny drop of non-toxic glue (craft glue pet-safe) on each knot. It helps keep threads from coming apart. Ever watched your kitty bat at a loose string? Yikes.
- Replacing worn foam grips: Peel off the old soft cover. Slide on a new handlebar grip (bicycle handle cover). If it slips, hot-glue on spongy padding (soft foam) so it hugs the wand tight. Your hand will thank you when your cat goes wild.
- Tightening loose wand joints: Use a precision screwdriver to snug those tiny screws under each connector. No more rattles when your kitty zooms. Really smooth play ahead.
- Unjamming stuck extensions: Gently pull apart the telescopic sections (sliding poles). Add a drop of silicone oil. Slide them in and out until they glide like butter. Whoa.
- Substituting broken wood segments: Swap a snapped stick with a wooden dowel (thin rod like a mini broom handle). Sand the rough edges. Use pet-safe wood glue to fix it. Good as new.
- Clipping plastic nib ends: Snip off any sharp or chipped bits on the plastic nibs (little tips). Smooth with fine sandpaper. Safe for teeth and paws.
- Fastening internal screws: Um, sometimes screws hide inside connectors. Pop them open gently. Tighten each screw so nothing rattles mid-chase.
- Customizing replacement parts: Keep extra elastic cords, feather bundles, or new plastic joints on hand. You can get them from the maker or pet-toy shops. Then you’ll always have what you need, no waiting.
Keep a little repair kit near your toys, strings, grips, screws, and those funny nibs. Next time something snaps, you’ll fix it in minutes, and your cat can jump right back into play. Worth every paw-print.
Interactive Teaser Wand Maintenance Tips for Hassle-Free Fun

Ever watched your kitty bat at that feather with sheer joy? Block off time each month for a quick wand check. I set a reminder on my phone so I don’t forget. That little habit keeps the springy cord and foam grip (soft handle) in purr-fect shape.
Next, grab a notebook or simple worksheet to jot down your care steps. Record cleaning dates, when you add a drop of silicone lube (lubricant), and any feathers or grips you swap, uh actually make that two reminders if you’re as forgetful as me. By tracking these tweaks, you’ll know when the cord loses its spring or the foam starts to wear. Trust me, your cat will thank you with purrs!
Here’s a quick checklist for each monthly check-in:
- Log any swapped feathers, cords, or grips
- Note frays or splits by marking wear patterns
- Run an end-of-season deep clean
- Plan to swap tired tips and freshen attachments
- Keep a supply station stocked with gentle soap, cloths, silicone lube (lubricant), and spare bits
Rotate through this list every month so no detail slides by. When seasons change, skim your notes for extra fixes, like a hidden split or a dull feather tip. With your supply station at arm’s reach, wand care stays smooth. And your kitty stays busy, happy, and feline fine.